Getting started
In this page we'll walk through creating a new application using XControls
You can download the sample application used in this tutorial here.
Supporting Frameworks
XControls builds on the shoulders of giants. Primarily Bootstrap and Bootcards, but others as well.
One of the key aims of XControls is that if we haven't provided something for you, that it will be easy to add yourself. To that end, all of our code is built on top of Bootcards, which itself is built on top of Bootstrap. This means that anything you can do with Bootstrap, you can do with XControls. If in doubt, visit the Bootstrap website for ideas of how to lay out your application.
In our sampler application we also use other frameworks. For example our charts make use of the Morris framework. If you're looking for ideas of how to implement Morris charts, you can visit their site for examples.
Download Files
Get the source code from Github or the XControls download page
- Download the controls from the XControls download page
- Create a new application in Domino Designer
- From the downloaded template, copy across design elements:
- Copy across Resources\Files
- Copy across all UnpBoot... Custom Controls
- Copy across "blank" theme and enable in DB Properties
- Copy across Unp... XPages
Common Header
We can create our standard application layout with a Common Header and Common Footer Custom Control included on most XPages

Every page we load needs the UnpBootResources custom control added. This adds CSS, JavaScript and Server Side JavaScript to your application. Don't forget to also enable the "Use runtime optimized JavaScript and CSS resources", this will drastically reduce the size of pages being loaded.
Next we define the navitems in UnpBootHeader. They will be used for mobile and desktop configurations.
Each menu item is an element in an array, we define the label, the icon to display and the page to open. Optionally you can also choose to load the page using Ajax rather than a full page refresh, this will be faster in most situations, so define the ajaxloadid and the ajaxtargetid for each menu item.
Save your commonheader custom control
Home Page
Now we can create our first XPage
As ever with Unplugged applications, our home page will be called UnpMain.xsp. Then we can add our commonheader and commonfooter custom controls.
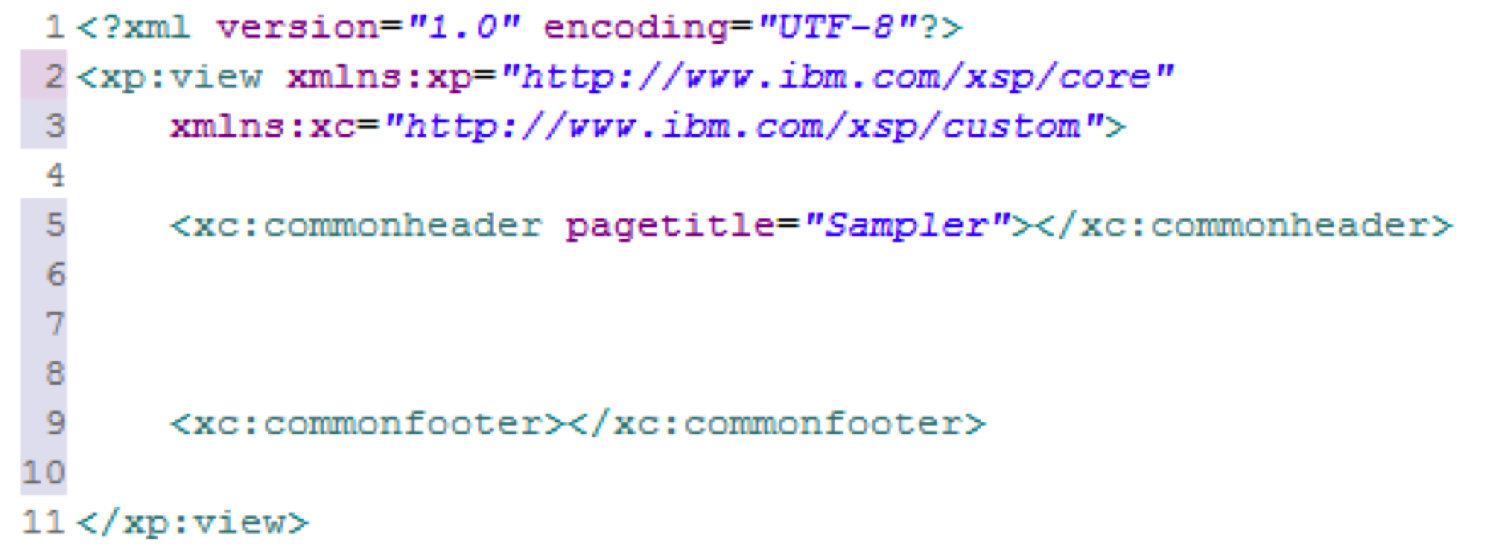
Now we need a list to display our view of data and a card to display documents. We'll add the list first using the UnpBootFlatView control:

All we need to specify the view to load data from, the columns to display, and what to do when a user clicks on a document.
The Document card will be easiest to re-use as a custom control, "personviewer" which we'll add a UnpBootFormViewer control to.

For each field in the form, we add a list-group-item div. Within that will be a label and then a computed field to show the data. The computed field will need to be set to output a tagname of H4 and a class of list-group-item-heading.
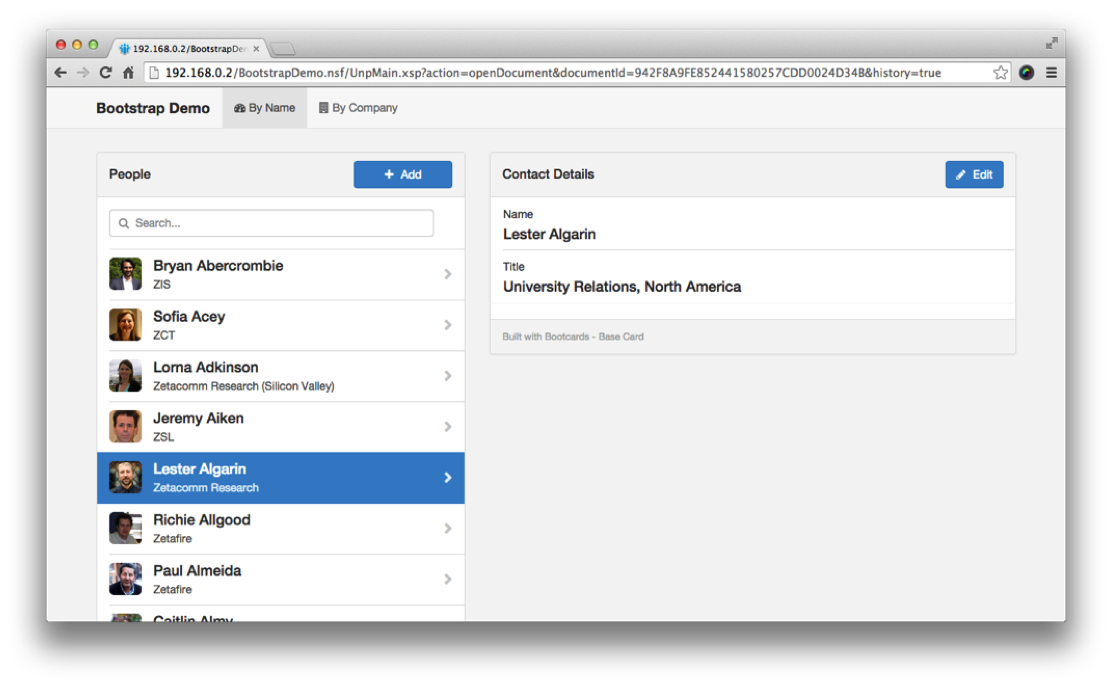
If we save and preview UnpMain now then we see some immediate progress:
Edit Person
We can view the person documents, but now we need to be able to edit them.
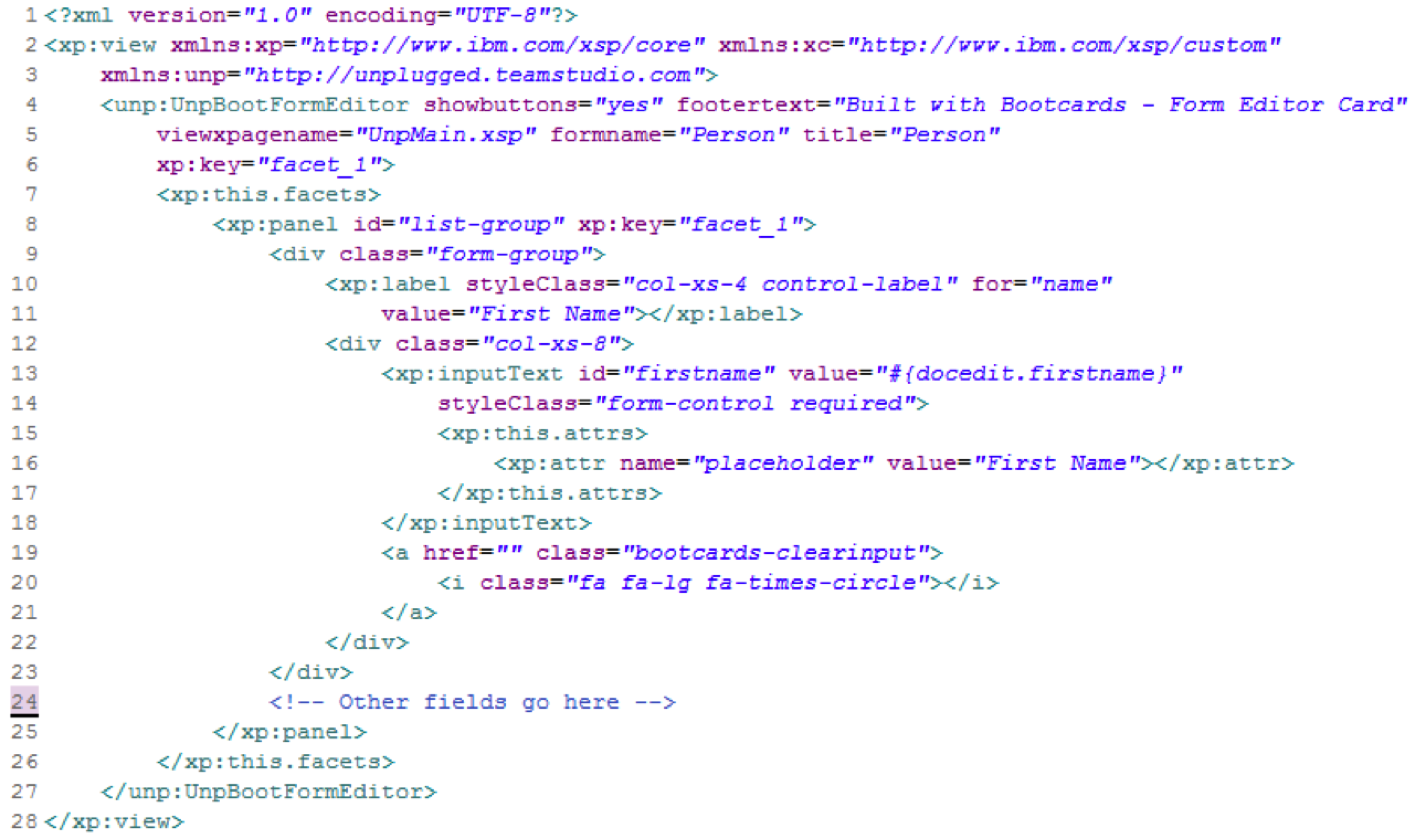
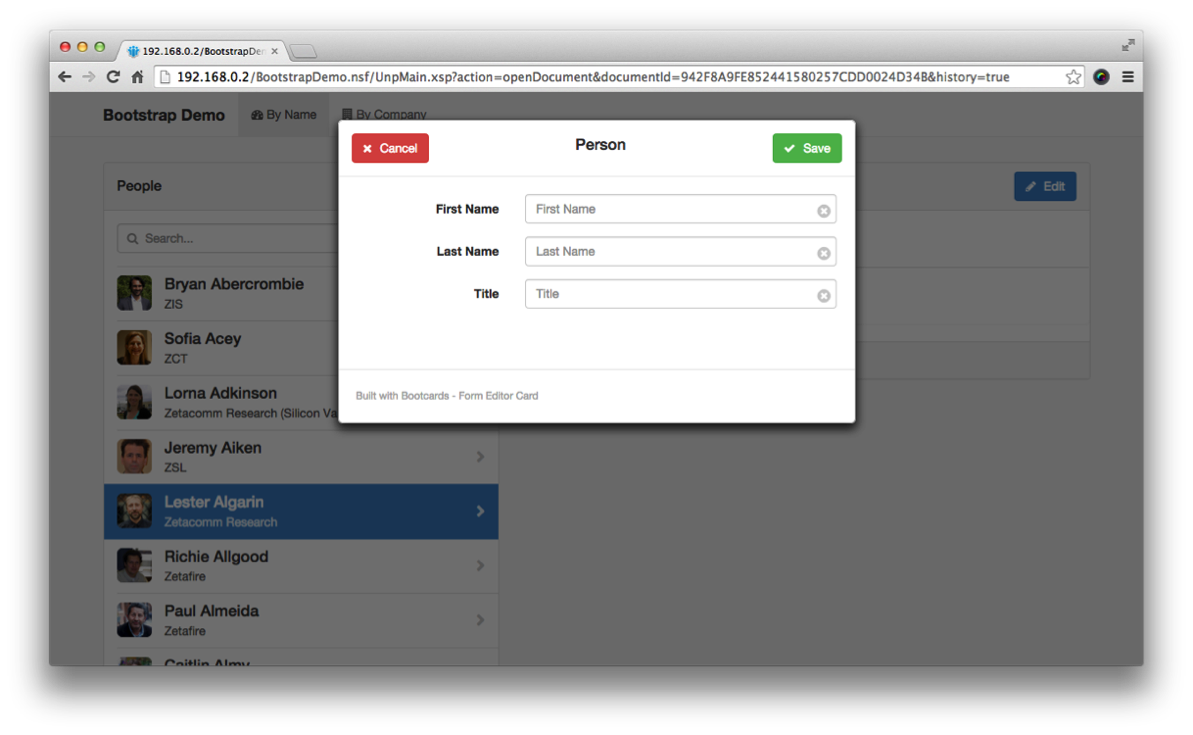
The PersonEdit.xsp XPage has a UnpBootFormEditor control added. Again, for each field we add a div and inside the div we'll add a label and a field. There are many options for extending fields to support mandatory field, date pickers, clearing inputs and so on. Full documentation can be found in the Form Editor documentation.
It's time to save the XPage and test editing from UnpMain
Accordion View
So far we have a view of people by last name, but now we want to add another view of people by Company, the XPage will be called ByCompany.xsp.
It's much the same as the FlatView and we can re-use the personviewer custom control.
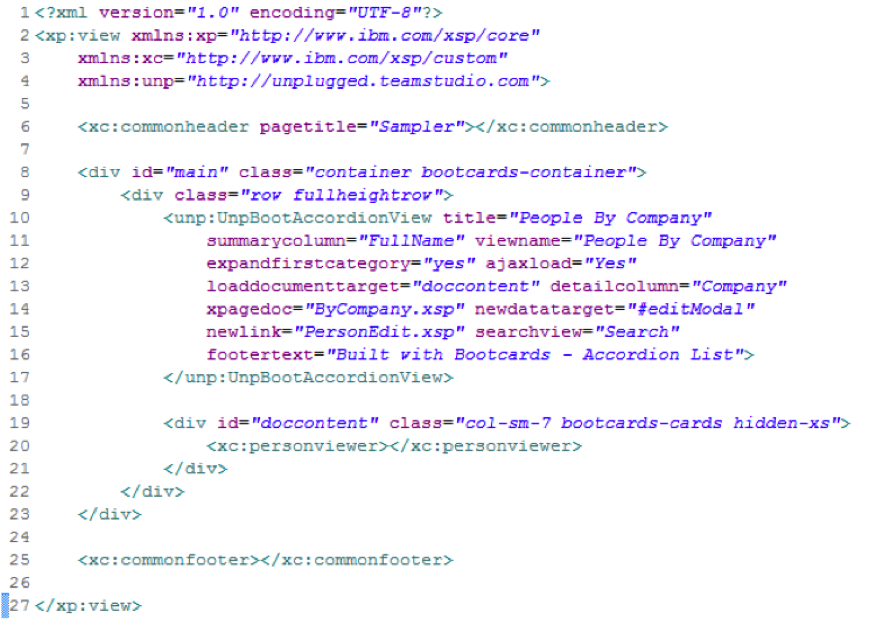
We can decide whether to auto-open the first category when loading the view.
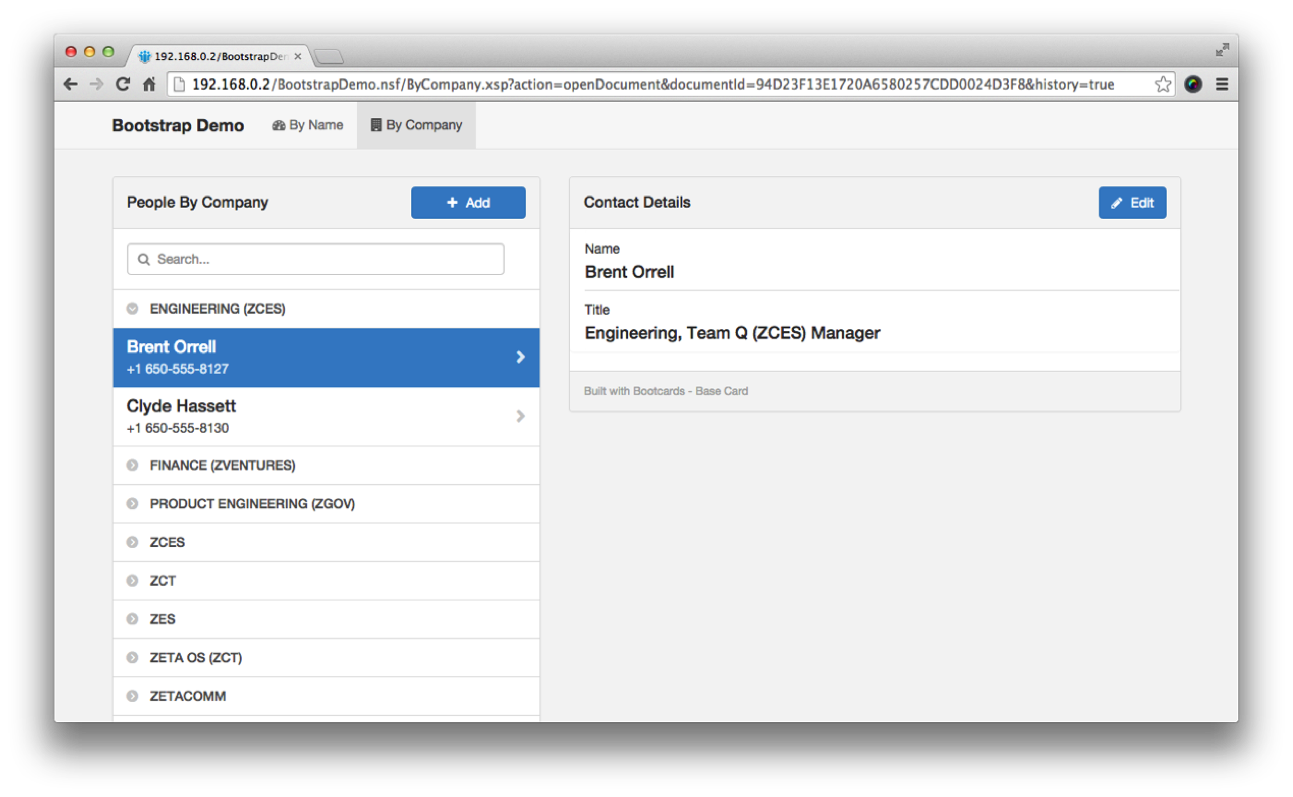
If we preview ByCompany.xsp then we see this:
Mobile Version
Everything we have created so far is going to work equally well on desktop and mobile browsers as well as Teamstudio Unplugged.

Advanced
This simple tutorial shows how to create a basic application. There are a lot of options that you can play with.
- Rich Text editing can be implemented using the TypographyEdit control.
- File Uploads are now supported including photo rotation and resizing using the Photo Upload control.
It's worth playing around with the Sampler application that you download when getting the controls from the XControls download page.
If you have issues or enghancement ideas, you can log them in the Github project.
